
Unlock Your Raspberry Pi Potential: VNC Behind Firewall Free Download
Picture this: you've got a Raspberry Pi sitting at home, humming away like a little tech powerhouse, but you're stuck miles away and need to access it. How do you connect without breaking the bank or turning your setup into a cybersecurity nightmare? Enter VNC behind firewall solutions—your golden ticket to remote access nirvana.
Now, let's be real. Remote access is more than just a convenience; it's a necessity in today's connected world. Whether you're managing servers, tinkering with IoT projects, or just want to stream files from your Pi, having a reliable way to connect is crucial. And guess what? You don't need to spend a fortune or become a cybersecurity expert overnight.
In this article, we're diving deep into the world of Raspberry Pi VNC setups behind firewalls. We'll break down the steps, share tips, and even point you toward some free download options that won't leave you scratching your head. So buckle up, because we're about to make remote access simple, secure, and stress-free.
- Janice Nichole Nude A Deeper Look Into Her Life And Career
- Exploring Telegram Wasmo Hot Pics Videos A Trending Sensation
Table of Contents
- What is Raspberry Pi VNC?
- Setting Up VNC Behind a Firewall
- Common Firewall Challenges
- Free VNC Software Options
- Security Tips for Remote Access
- Optimizing VNC Performance
- Troubleshooting Common Issues
- VNC Alternatives Worth Considering
- Where to Find Free Downloads
- Wrapping It Up
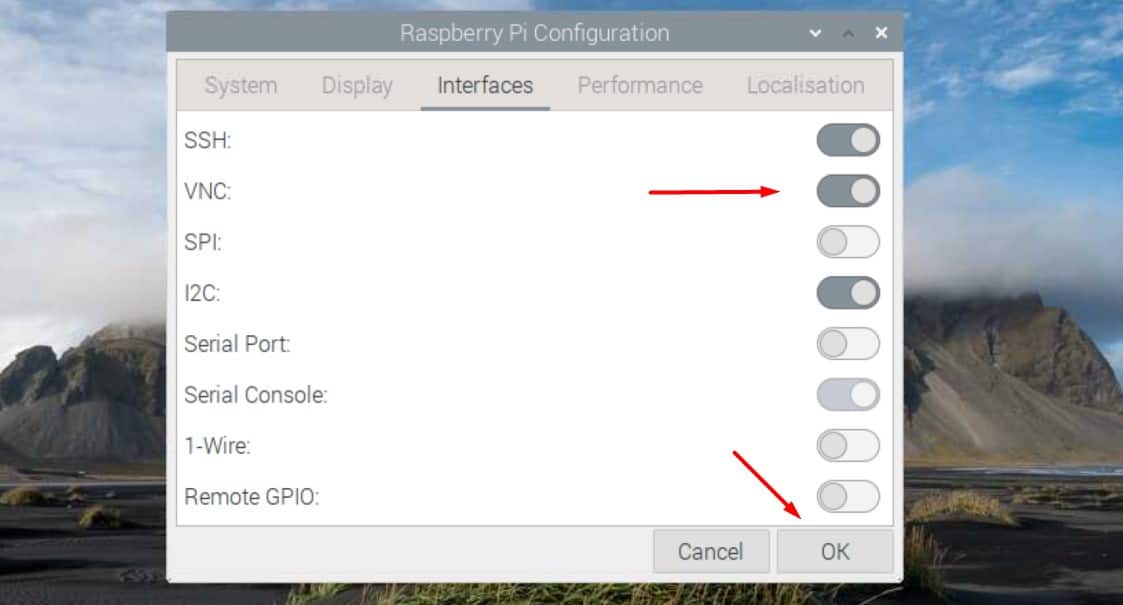
What is Raspberry Pi VNC?
Let's start with the basics. VNC, or Virtual Network Computing, is like a magic mirror for your Raspberry Pi. It lets you control your Pi's desktop interface from another device, whether it's a laptop, smartphone, or even another Pi. Think of it as remote desktop software on steroids, but designed to work seamlessly with your tiny powerhouse.
But here's the kicker: when your Pi is tucked safely behind a firewall, things can get tricky. Firewalls are great at keeping unwanted visitors out, but they can also block legit attempts to connect. That's why setting up VNC behind a firewall requires a bit of finesse.
The good news? There are tons of free solutions out there to help you bridge that gap. From open-source software to cloud-based services, you've got options that won't cost you an arm and a leg. And we're about to break them all down for you.
- Kensley Pope Latest News Updates Your Ultimate Guide
- Bollywood Hub Bolly4u Latest Movies Updates Your Ultimate Guide To The Latest Blockbusters
Setting Up VNC Behind a Firewall
Step 1: Prepping Your Raspberry Pi
Before you dive into the nitty-gritty of VNC setup, make sure your Pi is ready to roll. Here's a quick checklist to get you started:
- Ensure your Raspberry Pi OS is up to date.
- Install the VNC Server software. You can do this via the terminal with a simple command:
sudo apt-get install realvnc-vnc-server. - Set a secure password for VNC access. Don't skimp on this step—strong passwords are your first line of defense.
Once your Pi is prepped, it's time to tackle the firewall. But don't worry—we'll cover that next.
Common Firewall Challenges
Firewalls are like bouncers at a club—they're there to keep the bad guys out, but sometimes they get a little overzealous. When you're trying to connect to your Pi remotely, firewalls can block your attempts, leaving you locked out of your own setup.
Some common challenges include:
- Blocked ports: VNC typically uses port 5900, but firewalls might block it by default.
- IP restrictions: Some firewalls only allow connections from specific IP addresses, which can be a pain if you're connecting from different locations.
- Security protocols: Modern firewalls often require encrypted connections, which can complicate VNC setups.
The key to overcoming these hurdles is finding the right balance between security and accessibility. And that's where our free VNC solutions come in.
Free VNC Software Options
Option 1: RealVNC Viewer
RealVNC is the official VNC client for Raspberry Pi, and it's packed with features. Best of all, the basic version is free for personal use. With RealVNC, you can:
- Access your Pi's desktop interface from any device.
- Enjoy smooth performance, even over slower internet connections.
- Take advantage of built-in encryption for secure connections.
RealVNC also integrates seamlessly with cloud services, making it easier to bypass firewall restrictions.
Option 2: TightVNC
TightVNC is another popular choice, especially for users who prefer open-source solutions. It's lightweight, easy to set up, and works well with Raspberry Pi. Plus, it's completely free.
Some of TightVNC's standout features include:
- Customizable settings for optimal performance.
- Support for multiple platforms, so you can connect from Windows, macOS, or Linux.
- A strong community of users who can help troubleshoot issues.
Security Tips for Remote Access
When you're accessing your Pi remotely, security should always be top of mind. Here are a few tips to keep your setup safe:
- Use strong, unique passwords for VNC access.
- Enable two-factor authentication (2FA) whenever possible.
- Limit access to trusted IP addresses if your firewall allows it.
- Regularly update your Pi's OS and VNC software to patch vulnerabilities.
And remember, if something feels off, trust your gut. Security breaches often start with small, seemingly harmless oversights.
Optimizing VNC Performance
No one likes a laggy connection, especially when you're trying to get work done. Here are a few tricks to boost your VNC performance:
- Lower the screen resolution on your Pi's desktop interface.
- Disable unnecessary visual effects and animations.
- Use a wired Ethernet connection instead of Wi-Fi for faster speeds.
By tweaking these settings, you can ensure a smoother, more responsive VNC experience.
Troubleshooting Common Issues
Even the best-laid plans can hit a snag. Here are some common VNC issues and how to fix them:
- Connection refused: Check that your VNC server is running and that the necessary ports are open on your firewall.
- Slow performance: Try lowering the screen resolution or switching to a faster internet connection.
- Authentication errors: Double-check your password and ensure that 2FA is properly configured.
If none of these solutions work, don't hesitate to reach out to the VNC community or consult the official documentation.
VNC Alternatives Worth Considering
While VNC is a fantastic tool, it's not the only game in town. Here are a few alternatives to consider:
- SSH: If you're comfortable working from the command line, SSH can be a secure and efficient way to manage your Pi remotely.
- TeamViewer: This all-in-one remote access solution offers a user-friendly interface and robust security features.
- NoMachine: Known for its high performance, NoMachine is a great option for users who demand speed and reliability.
Each of these alternatives has its own strengths, so it's worth experimenting to see which one works best for your needs.
Where to Find Free Downloads
Ready to get started? Here are some trusted sources for free VNC downloads:
Always download software from official sources to avoid malware and other security risks.
Wrapping It Up
So there you have it—your ultimate guide to setting up VNC behind a firewall on your Raspberry Pi. Whether you're a seasoned tinkerer or just dipping your toes into the world of remote access, the tools and tips we've shared should help you conquer any challenge.
Remember, security and performance go hand in hand. By following best practices and staying vigilant, you can enjoy the freedom of remote access without compromising your setup's safety.
Now it's your turn. Have you tried any of these solutions? Share your experiences in the comments below, and don't forget to check out our other articles for more Raspberry Pi tips and tricks. Happy tinkering!
Article Recommendations
- New Sone385 Designs Features Revealed A Gamechanger In Modern Tech
- Janiceejanice Nude A Deep Dive Into The Phenomenon


Detail Author:
- Name : Dr. Leif Schroeder DDS
- Username : wayne.kuhlman
- Email : vmcdermott@luettgen.org
- Birthdate : 2003-09-06
- Address : 26425 Guido Inlet Langoshberg, NE 23087
- Phone : 914-463-7821
- Company : Auer Group
- Job : Architecture Teacher
- Bio : Cum quia qui corrupti sit et non quos. Rem nihil fuga ipsam vel quia sed. Harum ducimus ab nihil explicabo eius fugiat. Aut pariatur tempore fugit laudantium quam voluptatem dolorum.
Socials
instagram:
- url : https://instagram.com/tullrich
- username : tullrich
- bio : Ut velit mollitia qui. Id quia laboriosam beatae aspernatur repellat optio iste.
- followers : 2018
- following : 2803
facebook:
- url : https://facebook.com/tullrich
- username : tullrich
- bio : Odit perferendis recusandae similique praesentium.
- followers : 2844
- following : 1390
linkedin:
- url : https://linkedin.com/in/taya_ullrich
- username : taya_ullrich
- bio : Dolores voluptas qui et.
- followers : 5575
- following : 1980
twitter:
- url : https://twitter.com/ullrich1989
- username : ullrich1989
- bio : Officia et qui qui autem veniam minus. Omnis veritatis quas est saepe voluptatem. Id voluptate iusto ducimus quidem quo quaerat odit.
- followers : 4346
- following : 2511
tiktok:
- url : https://tiktok.com/@ullricht
- username : ullricht
- bio : Dolorem nemo cum id rem eligendi. Est qui dolores soluta. Non aperiam ex aut.
- followers : 4899
- following : 1206
